Lab. Process
Jon Dolding from Ceramic Designs Lab, describes how even challenging implant positions can be overcome with careful abutment design to produce beautiful results.
A 67-YEAR-OLD MALE presented after tooth extraction. He was fed up with wearing his plastic removable denture that had become ever less retentive, and was now causing pain and embarrassment. He and his dentist had decided that a fixed solution was the preferred choice, but a traditional cement-retained bridge on his remaining teeth was not an option due to the prognosis of the other dentition. His general health was good and his medical history showed that he would be a suitable patient for dental implants.
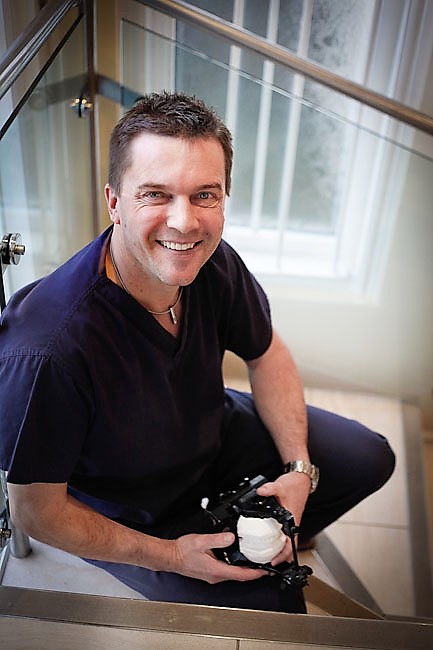
Jon Dolding, clinical director and owner of Ceramic Designs Laboratory qualified, as a dental technician, in 1985 and has been a business owner since 1992. Choosing to work in the challenging field of crown and bridge dentistry, he found a natural talent for cosmetic dentistry.
Always keen to challenge himself, he saw an interesting future in dental implantology when it was, in the U.K. in its infancy, so he took it upon himself to attend numerous implant courses to learn the new skills needed for this exciting field.
He soon became a Straumann Platinum registered technician and worked closely with them and Ivoclar as an opinion leader for the dental laboratory industry, along with being an early adopter of digital dentistry.
Ongoing education has always been vital and now Jon works with multiple implant systems where he continues to run clinical trials and beta testing for large and small implant companies as well as running Ceramic Designs Laboratory.
Once fixed in place, final but vital model and occlusal checks are made before scanning starts. After the scan data is captured and processed, a 3D virtual model image is used to design the restorations, taking into account the implant system, restoration type and “screwed or glued” final fixing.
Treatment Planning
After initial conversations between the patient and surgeon, study models were made.
The patient was made aware that following placement, a short integration period was needed, during which time he would still wear his adjusted and relined removable denture.
After six weeks the patient returned to the practice for the next treatment stage, where the bone-level implants were uncovered, integration checked, impressions and bite registrations taken. Ceramic Designs Lab was contacted and the case collected.
Impression Handling, Model Making, and Designing
The impressions are cast in the normal way and trimmed to allow for easy and comfortable handling.
Axiom bone level implants have a great impression ring that is placed onto the impression coping to mimic the chosen healing cap. These duplicate into the soft tissue masks ensuring the correct emergence profiles are replicated on the model. This makes fitting these restorations much more comfortable for the patients, who no longer need
Once fixed in place, final but vital model and occlusal checks are made before scanning starts. After the scan data is captured and processed, a 3D virtual model image is used to design the restorations, taking into account the implant system, restoration type and “screwed or glued” final fixing.
As this case was in the anterior region, we chose to veneer a zirconia framework as our restoration of choice. Zirconia gives us so many benefits over traditional bonded alloy solutions. With the most important, to the patient, being the enhanced aesthetics. This is also why we prefer to use a GH1.5 Flexi-base-zirconia interface connection rather than an Atlantis, titanium custom abutment solution. As you can see in the following slides, the gingival depth and thickness
As we are all acutely aware; ensuring that all

First scan capture and pre-anatomy design show screw access channel emerging through the labial of the 11 unit.

Custom abutment designed to allow parallel path of insertion to 13 retainer.
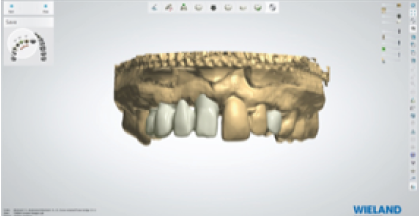
Aesthetic bridge design, covering screw hole and allowing for veneering porcelain.
We use 3Shape as our design software of choice, and Anthogyr allowed us to do the first U.K. clinical trials of their IOS scan body and DME files. This allows the case to be designed as two

Custom abutment cemented to Axiom BL 5 GH1.5 Flexi-base.
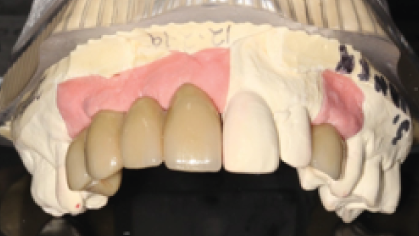
“Screw and Glue” retained bridge, in-situ, sitting passively against soft tissue mask hiding the cement junction of 11 on the stone model.

Custom abutment resting passively within definitive bridge framework.
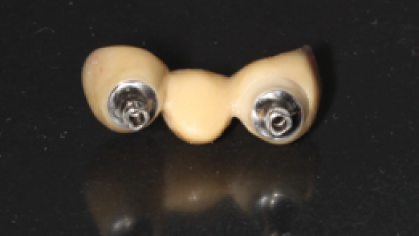
Custom abutment resting passively within definitive bridge framework.
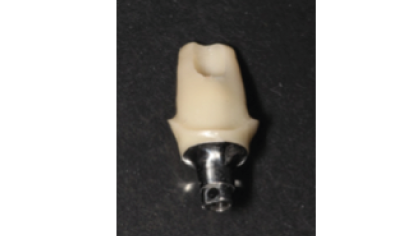
Laboratory-made zirconia custom abutment. We recommend using a slightly softened Temp Bond adhesive for this type of custom abutment design which will hold but allows the bridge to be retrievable.
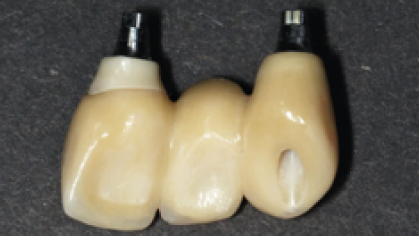
Palatal view of custom abutment design to passively sit on soft tissue, with the cement junction fractionally supra-gingival, and with a soft contour so that flossing is easy for the patient.
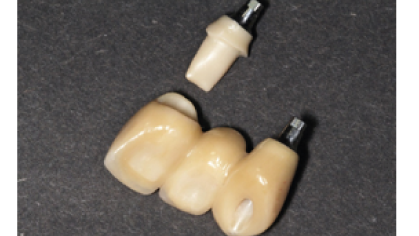
Tight occlusion meant very thin porcelain on palatal aspect but even in these thin sections the tooth coloured zirconia is still preferred by patients to a polished metal backing.

Labial bridge abutment cement junction is designed to be 0.5mm sub-gingival. The interface between the 1.5mm gingival height flexi-base and custom abutment is bonded and polished in the laboratory, ready for placement into the implant.
Custom abutment resting passively within definitive bridge framework.
From the blog
Winners of Best Dental Laboratory Award
We are proud to be winners in the category of Best Dental Laboratory at this year's Dentistry Awards. It is a great honour, and we thank everyone who has been a part of our journey. Thank you also to FMC and dentistry.co.uk for a great event! Jon Dolding, CDL...
