Case study by Lola Welch
Managing trauma in an adolescent patient
Case introduction
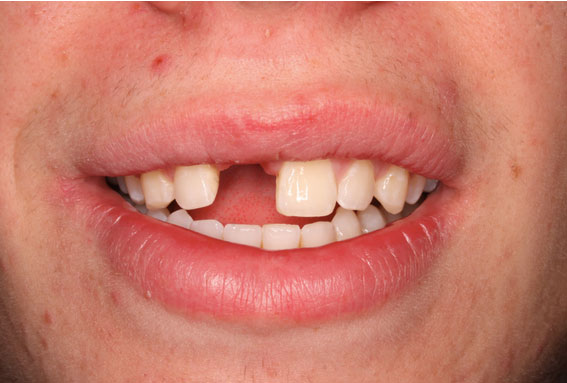
A 17.5-year-old male College student presented with missing UR1, trauma caused by an assault at a music festival. The fractured tooth was extracted by the patient’s general dentist two months prior to his visit to the Implant Centre.
The patient was provided with a small denture by his dentist but found it unsatisfactory aesthetically and functionally.
The patient was very young which had to be carefully considered during the treatment planning.
- WISHES – No denture
- ADJACENT DENTITION- Stable
- OE – Very clean mouth, no restorations
- SMILE LINE- High, but doesn’t quite show zenith of UL1
- RIDGES – narrow, vertical and horizontal loss
- OCCLUSION-class 1, space for temp
(Left lateral guidance – Group function
Right lateral guidance – Group function
Protrusive guidance – Onto 3, 4
Space 9mm matches adjacent incisor) - PA – taken for bone assessment and pathology prior to considering suitability for implants
- Review shows bone height suitable for implant placement.
Patient pre-op.
OPTIONS discussed with the patient included:
- Gap
Advantages = cheap, simple, no surgery. Disadvantages = aesthetics and function. - Denture
Advantages = cheap, simple, no surgery. Disadvantages = lack of security, comfort and function, unhygienic. - Conventional Bridge
Advantages = fixed, no surgery. Disadvantages = damage to adjacent teeth, harder OH, resorbing pontic site. - Adhesive Bridge
Advantages = fixed, no surgery, no tooth damage. Disadvantages = decementation and colour. - Implant
Advantages = fixed, secure, no damage to adjacent teeth. Disadvantages = cost, time and surgery.
The patient requested option 5 however due to his young age option 4 was chosen until the patient turns 19.
Surgery was discussed and all patients’ questions answered. Impregum impressions were taken and sent to Ceramic Designs Lab.
Disinfected impressions were cast with die stone and left to dry. The patient visited the lab for a custom shade match. A1 was chosen as a base colour however the patients’ adjacent teeth showed light staining and calcification spots. Photographs were taken and attached to the patient file.
Process outline
The first stage was to design and wax up the framework for a Maryland type/resin-bonded bridge. As the treatment plan included implant placement followed by a longer period of time with a sulcus former in place, a metal pontic was designed to be significantly high off the ridge to allow composite pontic adjustments after the implant was uncovered.
The framework was cast using non-precious metal. After the frame was devested it was trimmed, sandblasted, and primed for opaque and a composite build-up.
Composites used for this case were Crealign by Bredent and Nexco by Ivoclar. Due to a complicated shade match, GC stains (available from Bracon) were also used externally to mimic the patients’ natural dentition.
The finished bridge was sent to the clinic.
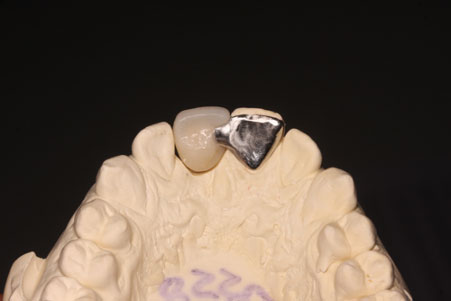
Finished bridge on the working model
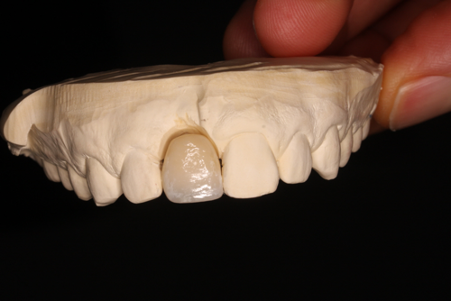
Finished bridge in situ on the stone model
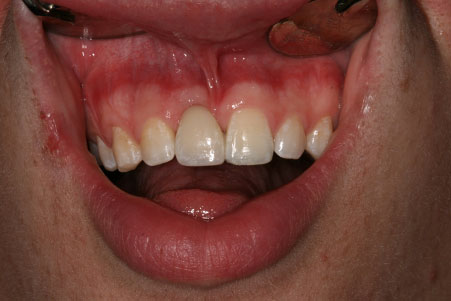
Bridge in situ showing slightly too high zenith of UR1
The pontic was built around existing tissues and presented a UR1 zenith high slightly higher than the UL1, however, both patient and clinician expressed high aesthetic satisfaction and felt confident to proceed with the treatment plan.
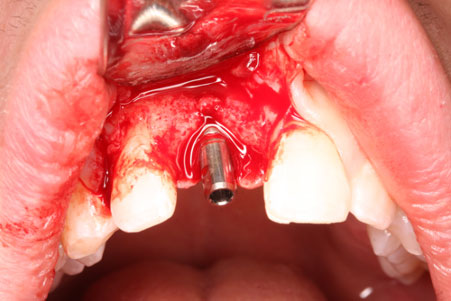
Ankylos implant and guide tube in situ.
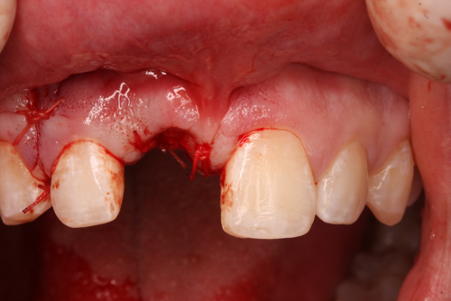
Post op, sutures in situ, labial view
The Implant placement was accompanied by a bone graft in the hope of restoring parts of the resorbed ridge and a cover screw was placed and tissues sutured up. Due to the soft tissue swelling, the fit surface of the pontic was slightly adjusted to avoid any severe compression and to allow the healing.
The bridge was cemented in place and excess cement was removed with floss to go comfortably over the pontic. The occlusion was checked and the patient was advised that he may feel the metal wing on the UL1.
After two months of the integration period, the implant was uncovered and the cover screw was replaced with a sulcus former. Again the bridge pontic had to be adjusted to allow for the former but even after trimming the aesthetics were highly satisfactory.
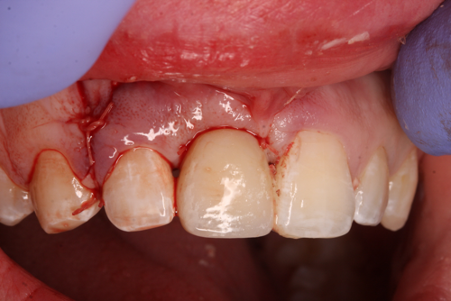
Bridge in situ showing nice tissue contour
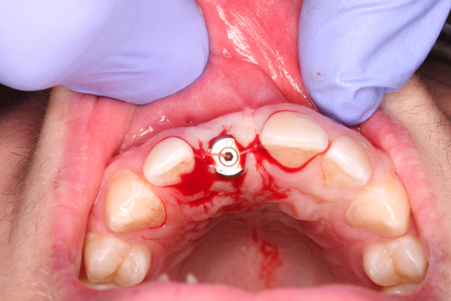
Sulcus former in situ
Conclusion
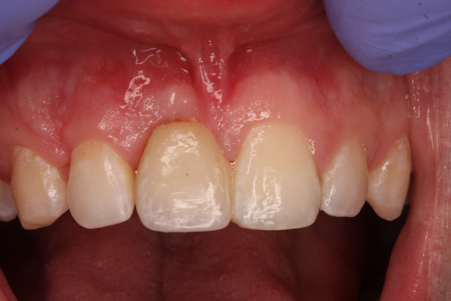
Healed tissues showing nice profile and aesthetic result
Now with the healed implant and the bridge cemented back in place, the patient and the clinician felt confident with waiting until the patient reached 19 years of age when a new treatment plan would be provided to restore the implant with a screw-retained ceramic crown. In the meantime the bone and tissue loss would hopefully be preserved and the bridge would provide the patient with confidence and comfort.
Let's work together

