Case study
Picture perfect
Case introduction
It is often the case when choosing a scenario with which to talk about most opt for either a single central for its intricacy or a full mouth rehabilitation for its complexity. For the most part these really allow for the entire team to showcase the best possible aesthetic outcomes.
In this case study we have also opted for the above, however this particular case came with several challenges.
The patient presented without preconceived ideas of what she was hoping to achieve and with English being her second language we were reliant on the help of a translator.
This may seem the perfect case assuming that we had cart blanche, but experience would tell us that these scenarios can end with a patient who isn’t particularly enamoured with the final result as your ideas don’t match theirs.
In these instances careful planning of preliminary stages is crucial in order to take on board any feedback from the patient so that as things progress, changes based on responses can be implemented. This is ultimately best for our patient and for the aesthetic outcome.
Following a thorough clinical assessment we were invited to meet the patient so we could put a face to a name. We believe that being able to interact with a patient is the only way to gain a true understanding of the overall picture. Knowing a patient’s facial shape, structure, expression and even the character always proves to be of huge benefit from diagnostics right the way through to the completion of the final prosthesis.
Stage 1
As the case presents:
With a large 4 unit bridge on the upper right failing and considerable bone loss around upper right 2/3, upper left 1 and 6 and severe caries effecting upper left 2, 3, 4 it was elected that a fixed all-on-four restoration would provide the best overall solution.
We felt that with careful consideration to the design it would allow our patient to keep everything clean and healthy. In regards to the lower, the teeth were in a far better state with good long term prognosis.
Two unopposed wisdom teeth were clinically recommended to be removed to ensure that the oral hygiene of the lower arch could be maintained.


Diagnostics were carried out by way of a prosthetic setup, taking into consideration any bone and tissue loss. On surgery day this was converted into the provisional bridge, which would give us the perfect foundation as a diagnostic tool for the fabrication of the definitive thimble bridge that had been prescribed from the outset.
This would allow the patient a considerable period of time during which to live with the arrangement and provide any feedback that could then be implemented into the final restoration.
The prosthetic setup on day of placement was picked up and converted, this was huge a transformation for our patient. It is so important that the prosthesis is assessed regarding the overall aesthetics in the comfort of the patient’s home environment.


At the integration check a full assessment was carried out asking for any feedback regarding changes that our patient would like to see made.
With these important points taken into consideration we were then able to start fabricating the final bridge design. This was carried out by scanning the in-situ prosthesis and then digitally adapting the setup to replicate the current arrangement in accordance with the likes and dislikes survey. The use of digital within the process gives us huge flexibility that would otherwise involve a new setup, maybe another bridge or possibly a leap of faith. By using digital in this way, we could (if the changes were significant) print or mill further bridges until our patient was happy with the overall appearance.
Using digital software, we began mocking up the proposed bar design. Unlike an acrylic wrap careful consideration was taken to ensure that there was ample support for the restorations and enough clearance around the mucosa for the composite work, yet leaving enough space so the patient would be able to keep the restoration clean with minimal effort. The ability to keep the prosthesis clean is of paramount importance in any restoration we fabricate.

A great example of ensuring a large restoration such as this is cleansable.
Following on from the review there were very few changes requested by the patient even in as much as the colour chosen for the provisional.

The digital process


Once clinician and laboratory verified the design we were then in a position to begin milling the restoration in PMMA. This allows us to refine fit and finish within the laboratory, allowing clinical verification of the occlusion, and for the patient to approve the alterations that have taken place.
This stage is possibly the most crucial, with any adjustments having been made to both Centric and excursive movements. This was made so much easier by using a softer PMMA material.
On completion of this assessment we proceeded with the construction of the definitive restoration, as is often the case with these large rehabilitations our patients prefer a far simpler overall aesthetic appearance. It’s not unusual to encounter a patient that would like heavy characterisation for example hyperplasia and exposed secondary dentine, but they do occasionally come along, this was however one of those cases where less is more.
With the bar cleaned and prepared we then set about anodising the superstructure. This aids the colour reproduction we were hoping for without the need to use cements that are overly opaque, which when using a translucent zirconia can have a negative overall impact, a silver superstructure can give a grey or ‘cold’ appearance, the use of an opaque cement can often lead to a bright and monochromatic appearance of the overall aesthetic.


The anodyzing process
The crowns were then lightly characterised in shape and subtle colouring to give a life like appearance. Centric and excursive contacts were checked, enabling us to bond them to the superstructure using Estecem II. Margins were cleaned of excess cement allowing us to begin fabricating the soft-tissue aesthetic. Varying shades of pink composite were used to complete this restoration.
Clinically, through studies of the many cases we have completed, the soft tissue characterisation is kept very subtle. Patient feedback conveyed characterised gingiva doesn’t feel particularly nice on the tongue, but also makes it incredibly difficult to clean areas of stippling and heavy character over long periods of assessment retaining calculus.


Smooth polished finish of the final restoration, this aids cleaning and longevity.
The final result
On fitting, relief channels are always checked to ensure simplicity of cleaning with either x-floss or super floss.
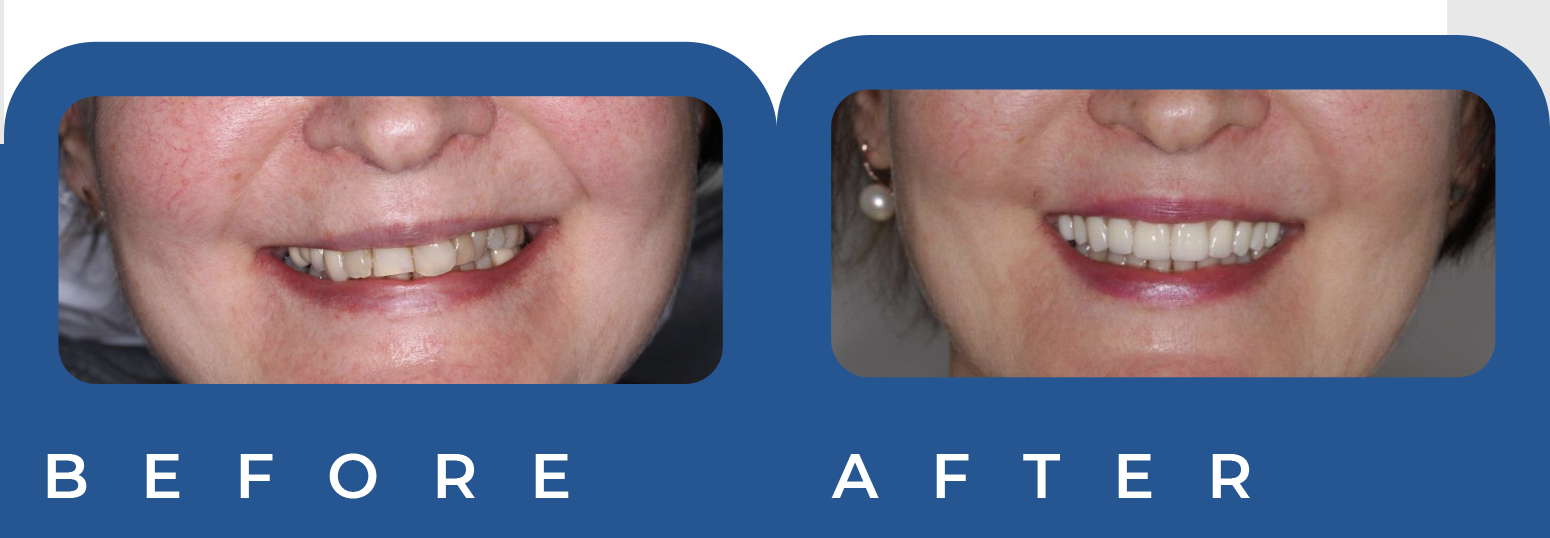
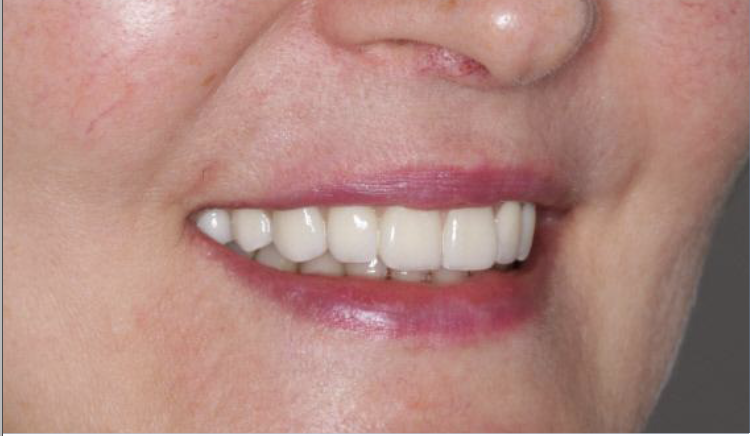
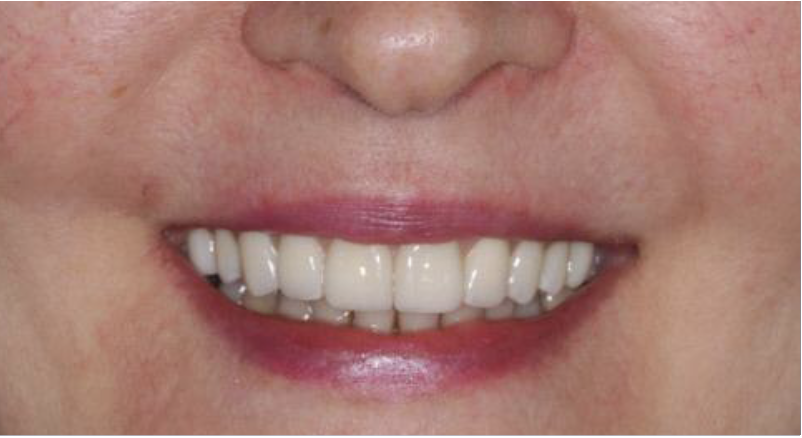
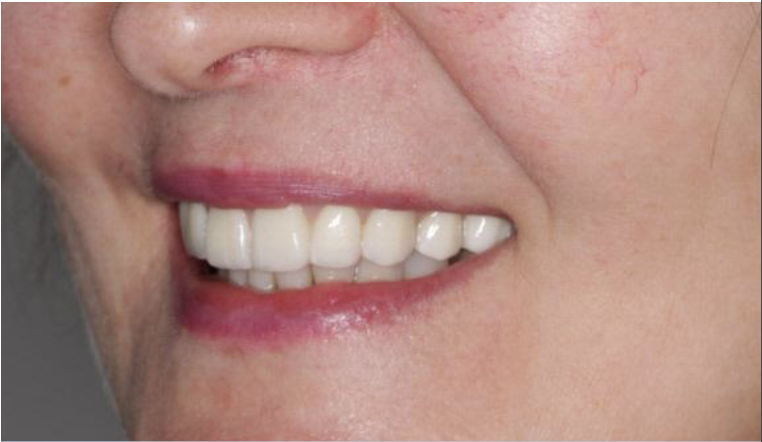
The fit appointment is always the one we look forward to, we are so fortunate to be present for the big reveal, it really is the only way to truly understand what really works best. For someone who seldom smiled, we feel this final images say it all.
This case summarises everything we stand for, trying to achieve the ultimate in aesthetics and function with a complete team approach.
Let's work together

