Clinical case study
ASA zirconia cutback crown on Axin cement-free abutment solution
Case study
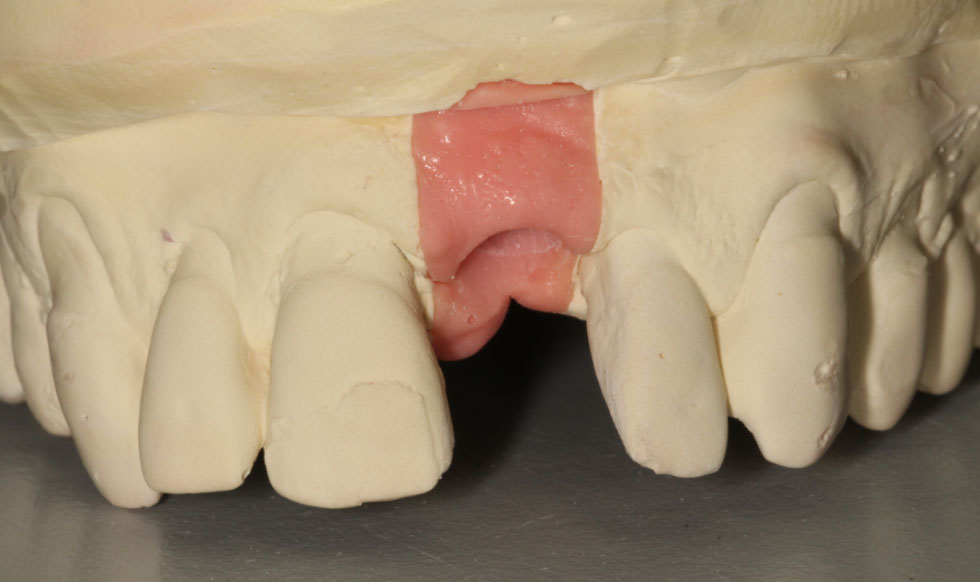
The patient is a 58-year-old gentleman with a missing upper left central. Unfortunately, we did not know much about the reason for the tooth loss and did not have the chance to meet personally with him either. We were only provided an upper and lower impression, a squash bite and a general A4 tooth shade.
Here at Ceramic Designs 90% of our work is digitally manufactured and milled or printed inhouse. In the laboratory, we have found the balance between the digital world, which is progressing rapidly, and the artistry of the technician’s hand skills, which will always be essential to characterise the restorations so that they match perfectly with the patient’s natural dentition.
In the crown and bridge department, our preferred restoration solution is a screw-retained crown on a titanium base which we can easily produce for all major implant platforms such as Ankylos, Straumann, Astra, Nobel and Anthogyr along with a vast number of less well known.

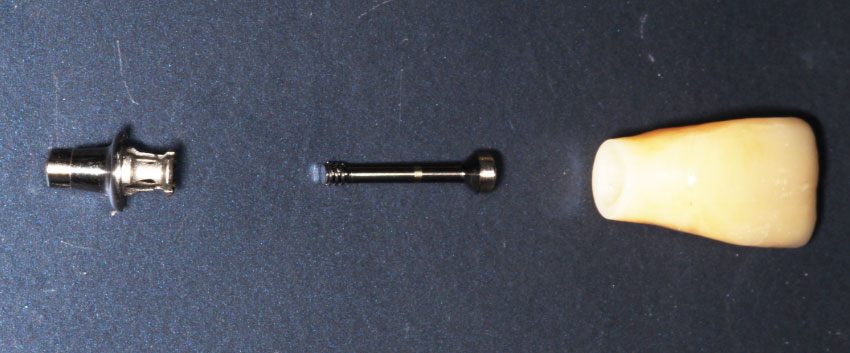
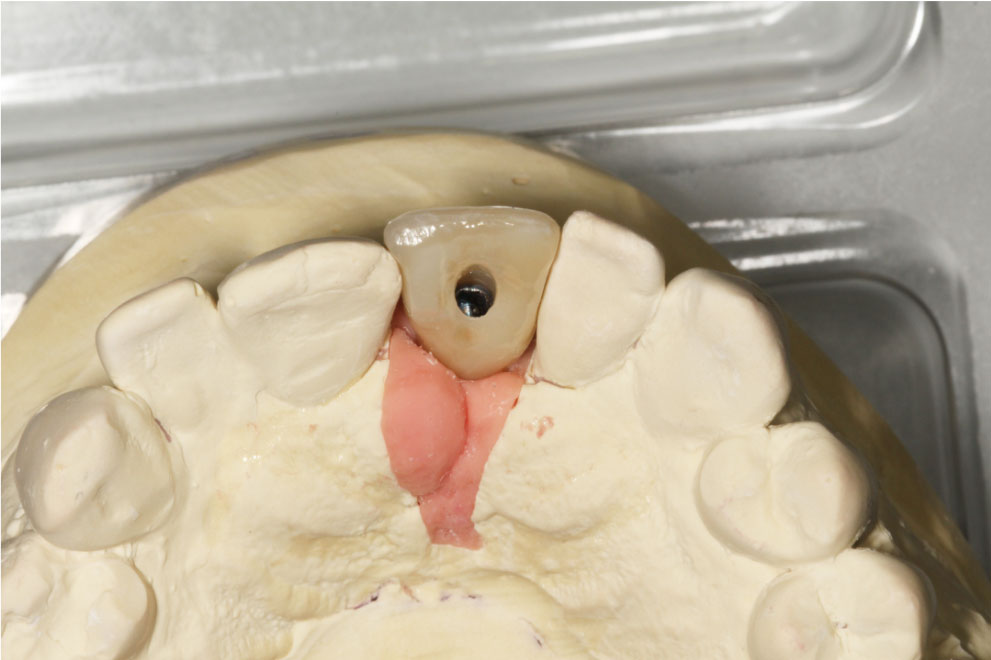
If we are unable to do a straight screw-retained crown, because of the angulations, we are happy to reach out for other solutions such as Atlantis or in this particular case we used an innovative Axin, cement-free angled screw access solution.
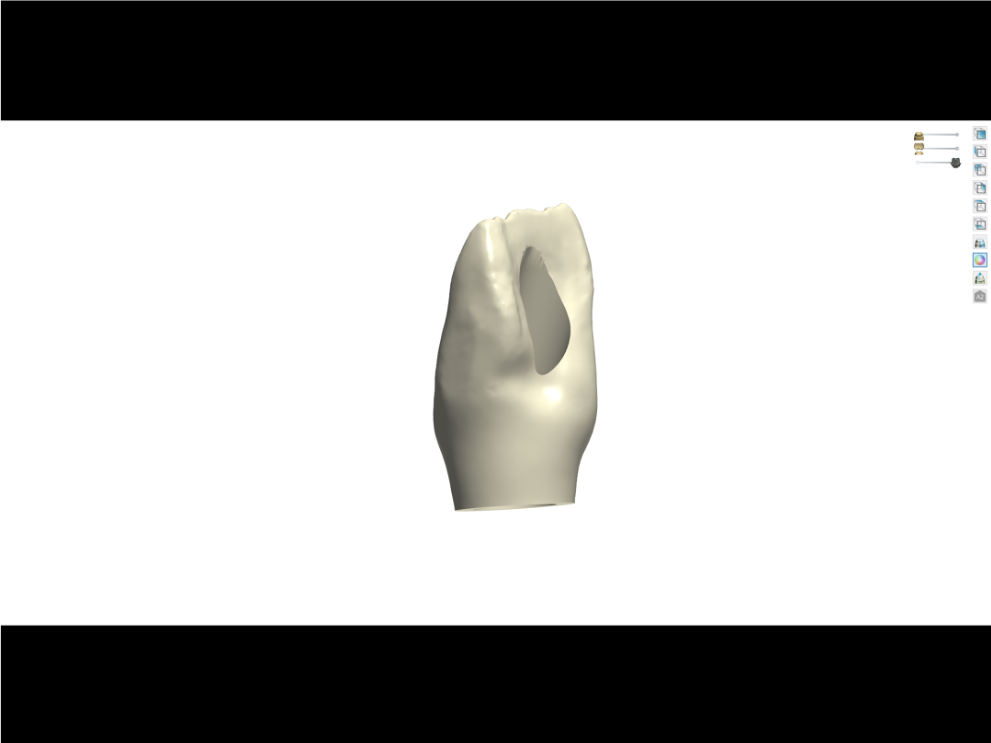
So here it is this simple single unit we have to restore on our 3shape software. Well…not that simple actually.
The initial scans showed difficult screw access so the lab had further discussions with the surgeon. He was unable to place the Axiom implant palatally enough to have the screw hole in an aesthetically correct position, therefore, we decided to use Axin. Using Axin means we are able to angulate the screw hole channel by the maximum 25 degree which is exactly what we needed to do in this case.
Unfortunately, we are not able to mill the Axin framework in-house as this system has a unique milled internal surface and locking cam abutment allowing it to be screw retained without cement.
The freedom of having our own in house milling machines gives us more control of the designs and the opportunity to custom colour and experiment with new techniques that may help us achieve better results for the patient.
For example, we can mill temporary crowns from PMMA so the patient gets an idea of how the final restoration will look and also can tell us if there is anything that they want us to change about their restoration.

PROCESS
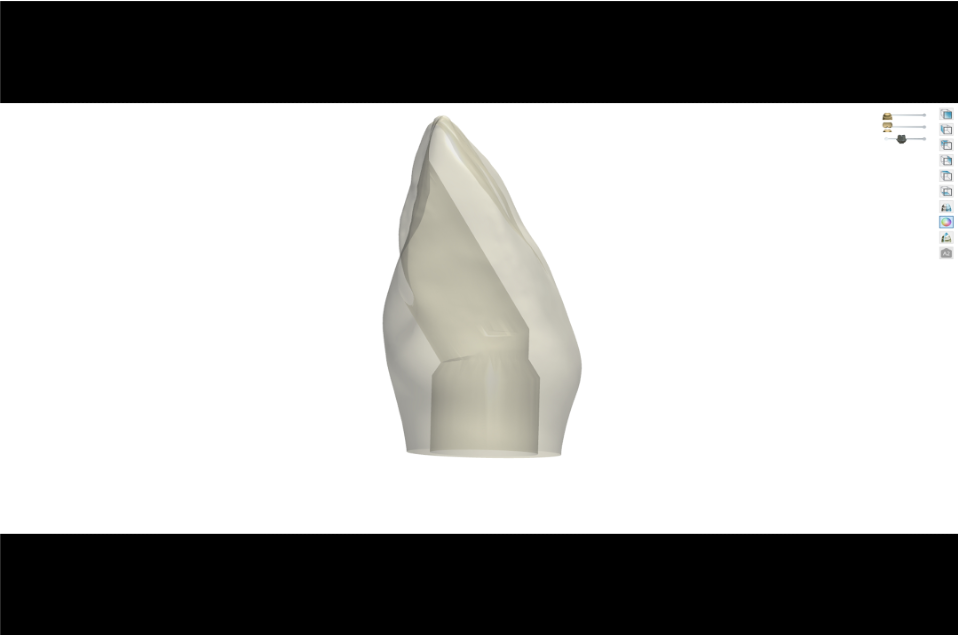
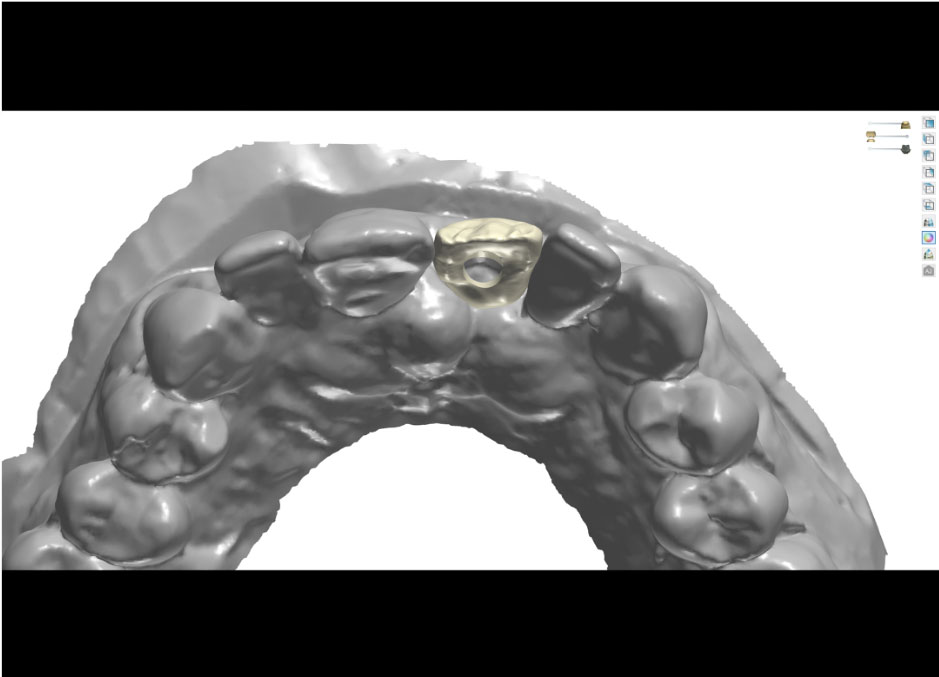
Our work started at the digital department where we scanned the models first and designed the framework with 3shape.
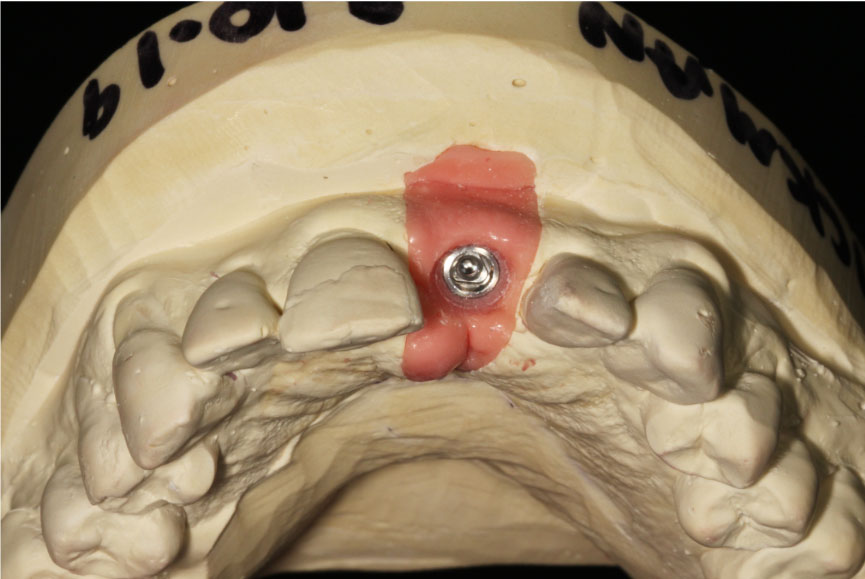
As you can see from the picture we are very limited with space. It is not just the palatally placed implant that makes our work harder but also the rotated teeth as well.
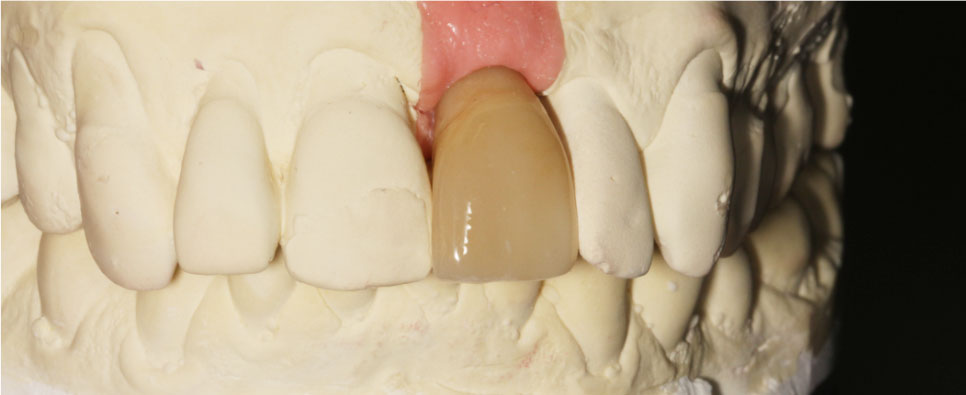
We decided to select a mamelon cut back full-contour tooth from one of our libraries so that we could meet the aesthetic and fundamental requirements that we need for a strong and functionally stable framework.
Even though we were able to do the scanning and designing of the zirconia framework we had to send the design stl files out to Semeda and work within their limitations.
Once we got the pre-colored, sintered zirconia cut back crown back we have to be very careful not mixing up the abutments.
If we screw it down on the clinical abutment we won’t be able to take it off again due to their unique cementless solution so we use lab abutments that don’t have the engaging cam.
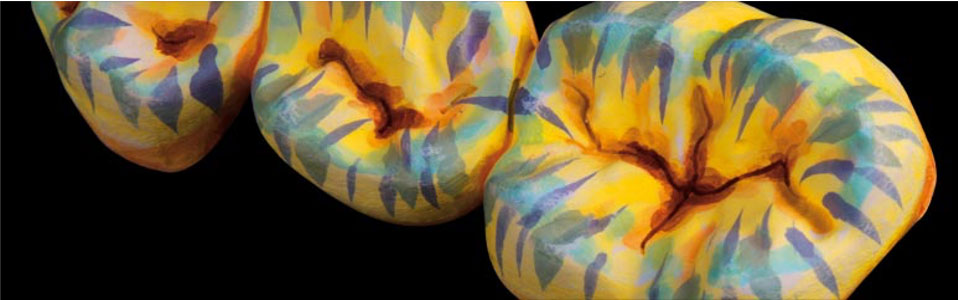
Because of Simeda’s limited shade range, we needed to characterise our frame before the ceramic build-up.
The requirement to achieve natural-looking restorations is one of the most challenging aspects of dentistry and the shade matching of dental restorations with the natural dentition is very difficult due to the complex characteristics of the natural teeth and this is why it’s advantageous to be able to mill in-house so that we can customise the surface texture and personalise the colouring of the raw zirconia.
To get individual color infiltration we carefully apply, with small brushes, different colouring liquids such as blue, violet, grey, amber, brown, etc. to create enamel, neck and fissure effects the final body coloring is achieved by dipping the restorations into A-D tooth shade liquids before the sintering process. An example of which you can see in the images.
This pre sinter characterisation allows me to work with less space reducing the amount of porcelain needed during the build-up.
FINAL RESULT
The successful delivery of our restorations is dependent on many steps in the surgery and the laboratory. One of the most important processes is impression taking. Our need for accurate impressions is essential as drags on neighbour teeth make it hard for us to copy surface texture, contour and for achieving optimal contact points cleaning and tissue support.
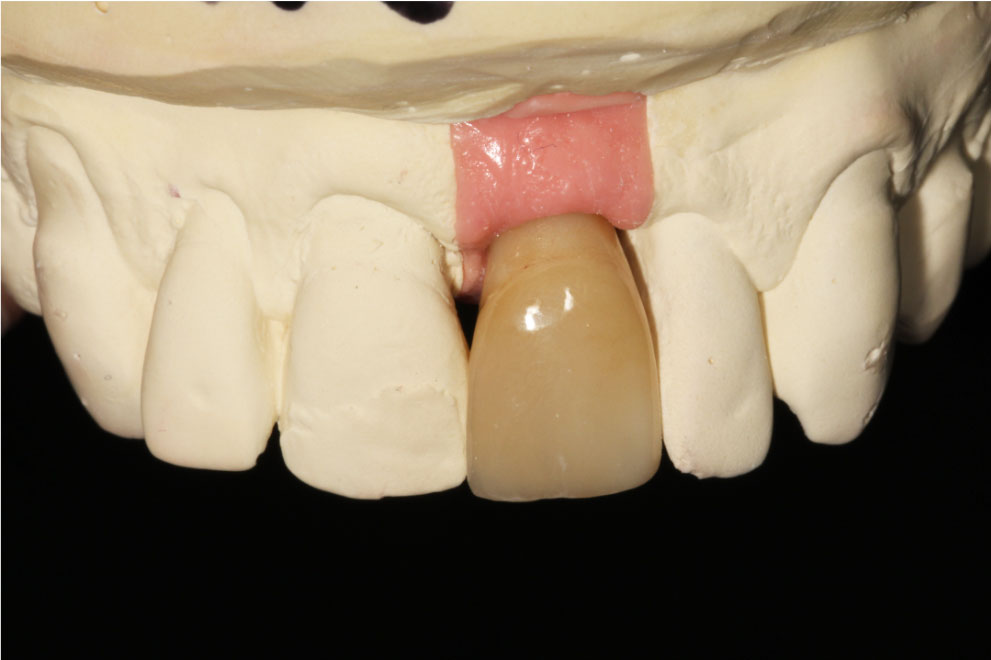
Once the crown is fitted the dentist will use composite on the incisal edge of the UR1 to complement the chip. The surgeon was advised to do tissue surgery to ease the fit of the implant crown so we can reduce the pressure of the gum and have a better emergence profile as well.
The final result is an aesthetic screw-retained implant crown thanks to the collaboration between the lab, surgery, and technicians who all work combining traditional skills and new methodologies because now we live in a world where almost everything is digitally run but we will always need skilled hands that do the final precise additional adjustments.
Let's work together
